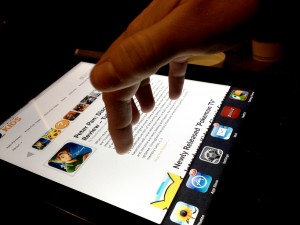
So, you have an iPad. A rather plain, thin, rectangular apparatus with only a few buttons. No keyboard. No joystick. No remote control. Only a touchscreen. With this touchscreen, your fingers are in control of where you go on your iPad. Hopefully by now you have learned the basic single-finger movements: The tap, drag, flick, swipe. Did you know, however, that there are 4 and 5-finger movements that can save you time and increase your efficiency?
They can also make you look pretty cool. No offense, but we could all use a few more cool points.
Grab your iPad, flex your fingers, and try the following multi-touch gestures.
First Things First
Multi-touch gestures are usually turned on by default in the newer versions of iOS, but it’s very simple to check whether they are enabled on your device:
- Open Settings app and tap on “General”
- Scroll down to find “Multitasking Gestures” and flip to ON
The Gestures
- The 5-Finger Pinch. Spread your fingers wide on the screen and pinch inwards to return to the Home Screen.
- The 4-Finger Vertical Swipe. Move 4 fingers towards the top of your iPad, and the multitasking bar will appear at the bottom of your screen. You can use this gesture instead of double tapping the Home button to show the most recently used apps. Simply swipe 4 fingers back down to hide the bar.
- The 4-Finger Side Swipe. Swipe 4 fingers to the left or right, and the iPad quickly moves through your running and most recently used apps.
Congratulations! You have earned 10 cool points. Incorporate these multi-touch gestures into your iPad repertoire and watch crowds gather to ask for your autograph. Okay, maybe not. However, you could save yourself a few minutes here and there…and definitely impress at least a couple people at the next office party.


