So my 7yo son has this new thing now. Apparently he wants this thing called privacy and frankly, I’m not quite sure what that is. If I don’t follow him like a hawk he will be figuring his way around the iPad and certainly trying to watch something he knows he shouldn’t. Before I figured out how to set up Parental Controls on the iPad I was totally the Bad Cop; now that I’m not a helicopter I’ve been promoted to Moderately Restrictive Cop. At this point, ‘ll take what I can get.
For those of us who share a family iPad, it makes a lot of sense to set up different profiles for each user. (If you haven’t already done this, we’ll feature a post tomorrow about how to set up profiles.) Under each profile you can customize the settings, which means Little Billy won’t rack up $500 in iTunes charges from in-app purchases. It also means that you won’t be frustrated with the settings when you use your profile to try and download music.
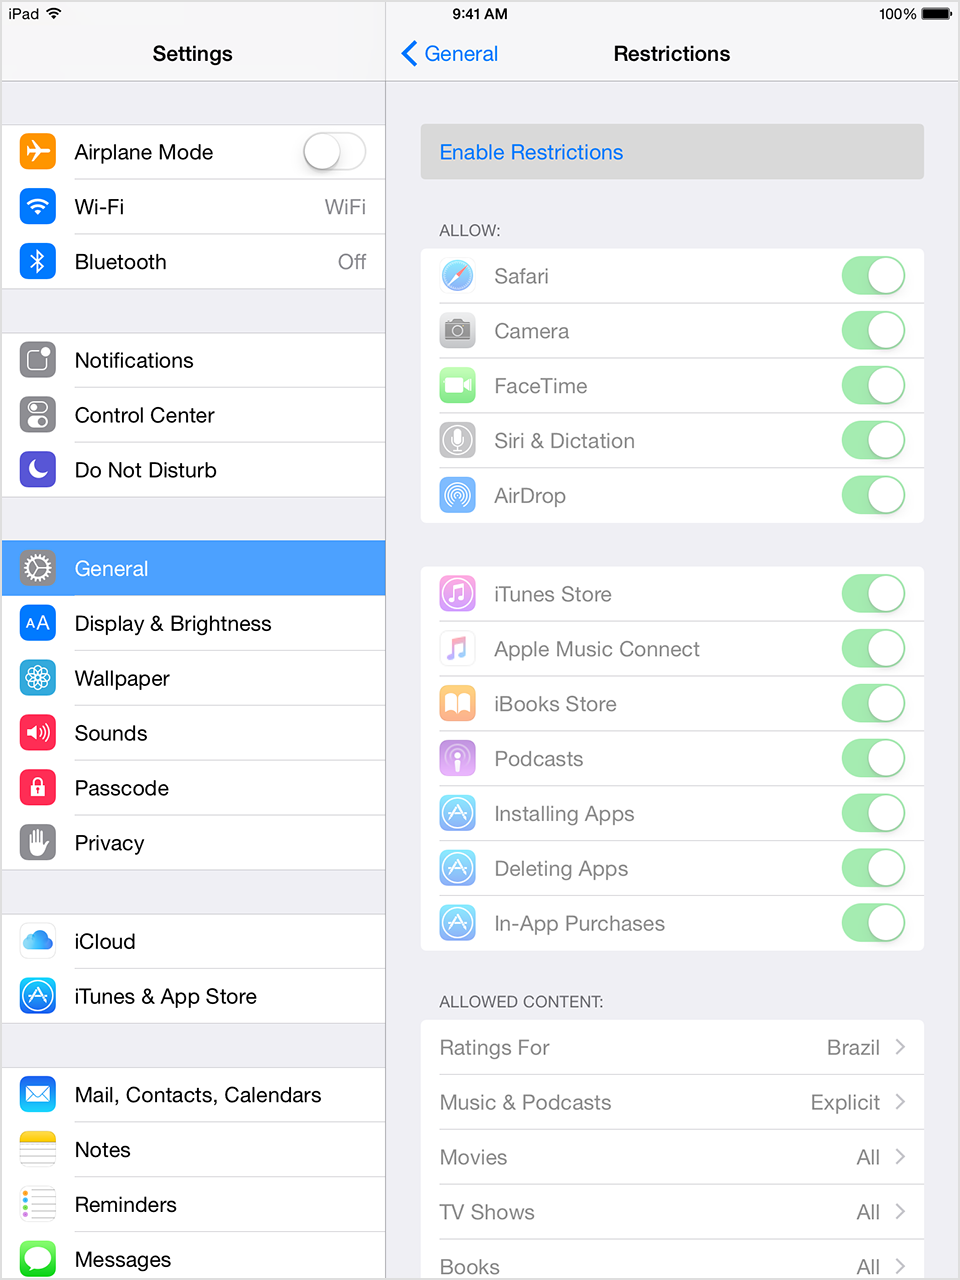
Using the Restrictions settings, you can control access to the specific Apps and features, as well as limiting in-app purchases and purchases from the App Store. Restrictions also prevent little fingers from changing important settings, and most importantly, using Restrictions settings can really help filter out potentially kid-unfriendly content.
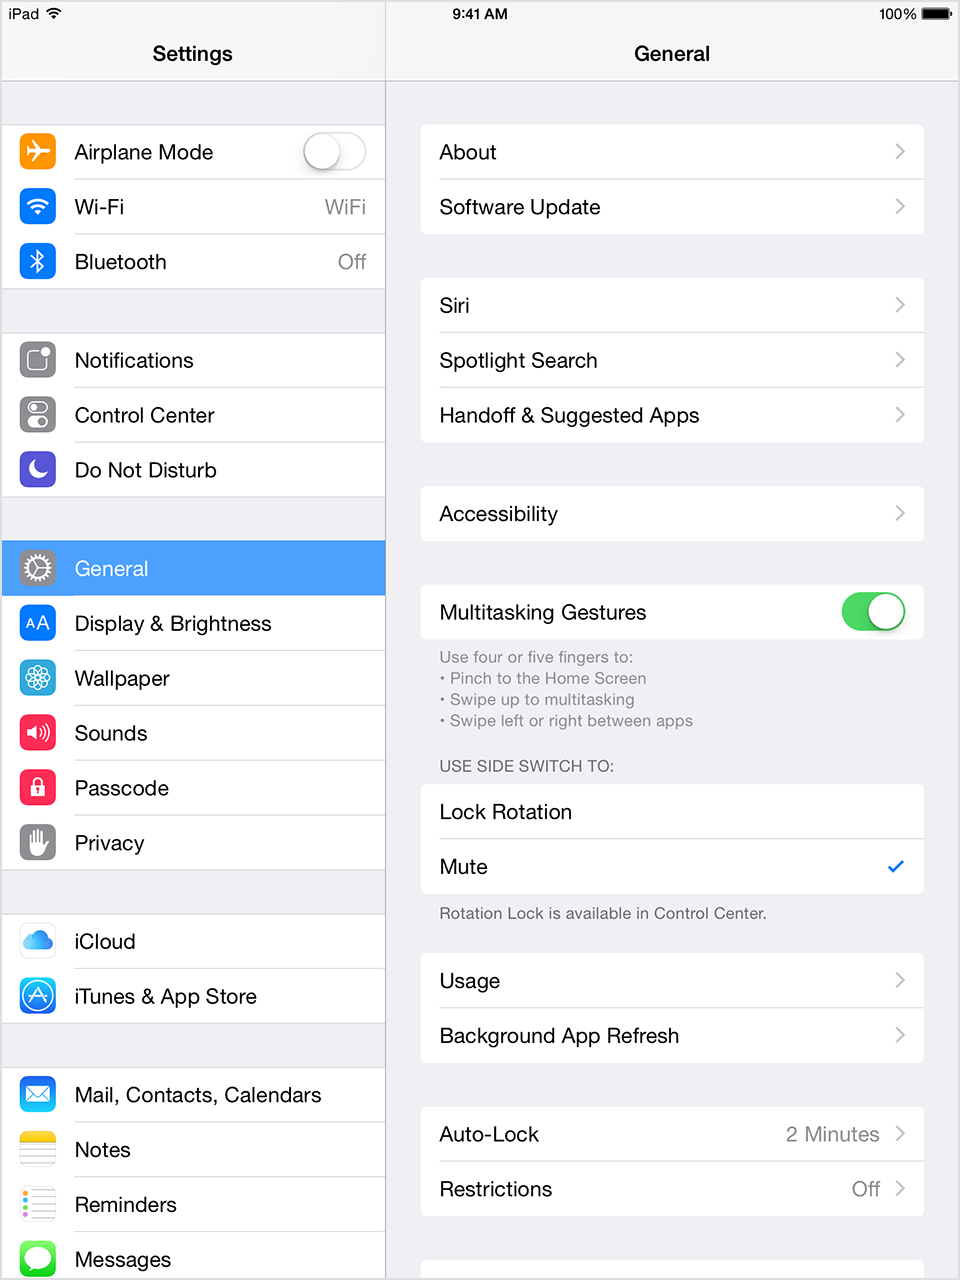
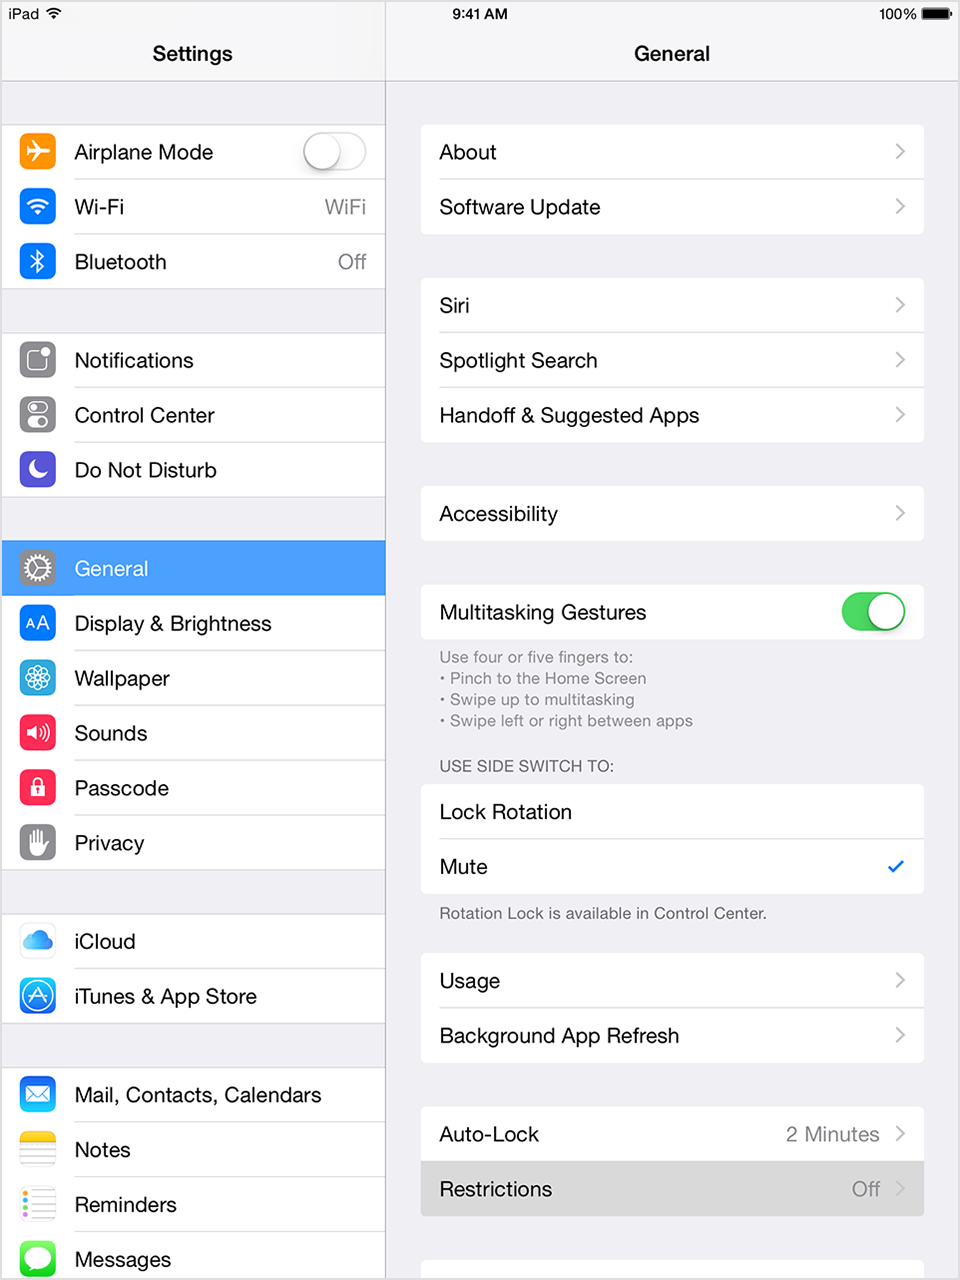
Below you’ll find a quick guide with pictures to help walk you through setting up Restrictions-slash-Parental Controls. There’s no guarantee that your little genius won’t eventually find their way around these settings, at least they’ll help you control their quality of screen time (and your sanity):
Tap Settings > General.

Tap Restrictions.

Tap Enable Restrictions and enter a passcode. You’ll need this passcode to change your settings or turn off Restrictions*.

*If you lose or forget your Restrictions passcode, you’ll need to erase your device and then set it up as a new device to remove the passcode. Restoring the device won’t remove the passcode.


